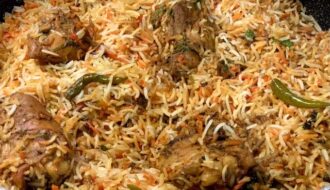
What can be better for lunch than a plate of steaming hot Hyderabadi Mutton Biryani! Now you can make this delicious biryani in your kitchen! Follow this recipe in detail and this biryani will taste just like the one you get in the Paradise Restaurant in Hyderabad.


How to make Restaurant Style Hyderabadi Mutton Dum Biryani
Description
Do you wonder why your mutton biryani at home doesn’t have that restaurant-style taste! After loads of takeaways and tweaking my biryani recipe I am thrilled to share all the tips and tricks with you! I will also share the recipe of a simple Raita and a delicious Salan to go with your biryani! So my biryani lovers, let’s cook together!
Ingredients
Fresh Garam Masala for Biryani
Biryani
Raita (Yogurt mix eaten with Biriyani)
Salan (Gravy eaten with Biryani)
Instructions
- Make sure to soak the basmati rice in water at least for 30 min before cooking Biryani
- To the mutton add 1 tablespoon of fresh lime juice, turmeric powder, 1 tablespoon of ginger garlic paste and salt to taste
- Beat the yogurt well and add approximately half of it
- Mix well and marinate at least for 30 minutes
- Add saffron to the milk, one drop of kewra essence, one drop of rose essence and a pinch of orange food color
- Mix and pour half of the milk in another cup
- To that cup add a pinch of red food color and mix well
- Set a pressure cooker on medium heat and add 1 tablespoon ghee to it
- Add the marinated mutton in
- Add approximately 1.5 cups of water
- Pressure cook the mutton until tender
- The time for the mutton to get tender will depend on your pressure cooker. In the pressure cooker that I use 20 minutes of cooking under pressure is enough to tenderize the meat
- Once the meat is cooked take out the meat pieces from the stock and place it in a separate bowl
- Don’t discard the stock we will use that as well
- To a pan set on medium heat add cinnamon sticks, green cardamom, Bayleaf, cloves, black peppercorns, star anise and coriander seeds
- Roast for approximately three minutes or until they turn aromatic
- Transfer everything to a grinder jar and add a piece of Mace or javitri into it.
- Grind to a smooth powder
- To a pan set on medium heat add 2 tablespoons of cooking oil
- Add cumin seeds and Shahi jeera
- Once they start to splutter add onions
- Add some salt to the onions so they cook faster
- Stir fry the onions for approximately 10 minutes or until they become dark brown in color.You can also deep fry the onions instead to make this step faster
- Take 2 tablespoons of the fried onions out of the pan and set it aside for garnish
- To the remaining onions add 90% of the remaining ginger garlic paste
- Stir fry on low heat for approximately one minute
- Add in the green chillies and give it a quick stir
- Add 1 tablespoon of ghee and add the pre-boiled mutton pieces in
- Turn up the heat to medium and mix well
- Add Kashmiri red chilli powder and stir fry till the mutton browns well
- This should take approximately 7 to 10 minutes
- Add salt to taste
- Add 1 tablespoon of lime juice
- And mix well
- Add the remaining yogurt and give it a quick stir
- Pour in the mutton stock
- Turn up the heat to high and cook till all the gravy reduces to half. This should take approximately 10 minutes or so
- Mix well
- Check for salt and make sure that the gravy is slightly salty because it’s going to be mixed with a lot of rice
- Take approximately 4 liters of water in a pot
- Add enough salt to the water so it tastes like sea salt
- I add approximately 8 to 9 teaspoons of salt
- Add the remaining fresh lime juice
- Add the leftover ginger garlic paste
- Add the leftover garam masala and mix thoroughly
- Once the water comes to a boil add in the pre-soaked basmati rice
- Cook till the rights is 90% done this should take approximately 15 minutes on medium heat
- Take a flat pan and set it on medium heat
- On this flat pan place the pan with the mutton.This prevents the mutton from burning while the biryani cooks
- Spread the rice (immediately after straining) evenly on the mutton
- Sprinkle the orange and red colored saffron milk on the rice
- Garnish with the remaining coriander leaves, mint leaves, and fried onions and place the lid on
- Make sure that the vent of the lid is covered
- Let the rice cook on medium heat for 10 minutes and then on low heat for 15 minutes
- Biryani is ready!
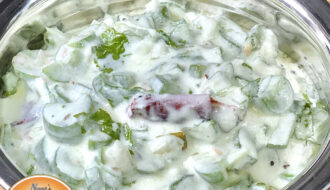
- Add yogurt in a big bowl
- Add approximately 3/4 teaspoon of salt
- Beat the yogurt till it’s smooth
- If the yogurt is too thick add some water
- Add lime juice, chopped onions, chopped tomatoes, chopped green chillies and chopped coriander leaves
- Give it a good mix
- Set a pan on medium heat
- Add peanuts and roast them till they are darker and aromatic. This should take 3 to 5 minutes
- Lower the heat, add sesame seeds and dry coconut and stir till it starts to look a little oily. This should approximately take 1 minute
- Transfer this to a grinder jar
- To the same pan add approximately 3 tablespoons of oil and set on medium heat
- Add chopped onions and 3/4 teaspoon of salt
- Stir till the onions turn golden brown
- Move the onions to one side of the pan and to the remaining oil add cumin seeds, mustard seeds, coriander seeds, fenugreek (methi) seeds, curry leaves, and give it a quick stir
- Add Coriander leaves, mint leaves, slit green chillies, ginger, garlic, dry red chilli, and turmeric powder. Stir fry till the garlic turns slightly brown
- Transfer everything to the same grinder jar and grind it to a smooth paste. You may need to add some water to do this
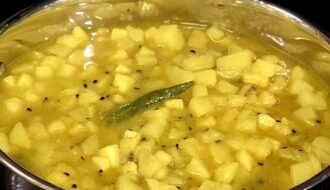
- Add the paste to a pan set on low heat and add 1 cup water
- Add kashmiri red chilli powder
- Cover and cook on low heat for approximately 15 minutes
- Add tamarind paste
- Add salt and sugar to taste
- Mix thoroughly
- Done!
Let’s marinate the mutton
Prepping the food colors
Pressure cooking the mutton
Making Fresh garam masala
Cooking the onions
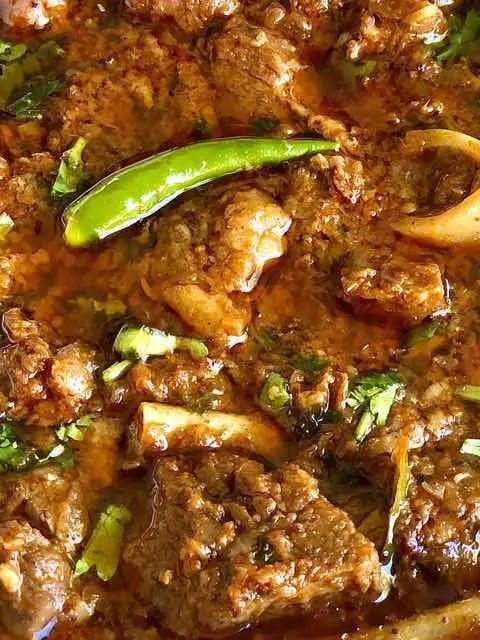
Cooking the mutton
Cooking the Rice for the biryani
Setting up the biryani
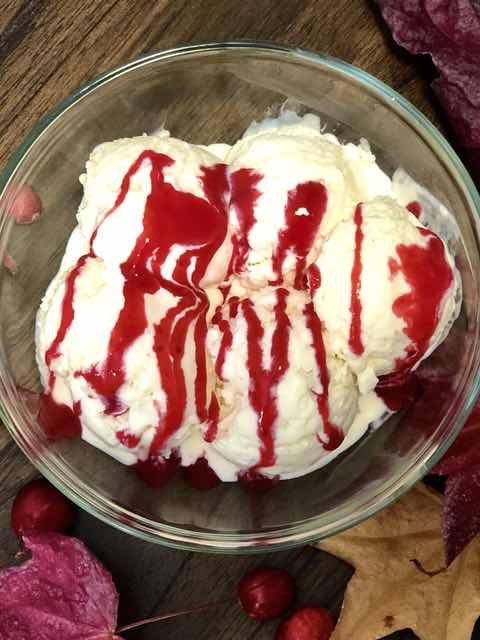
Raita
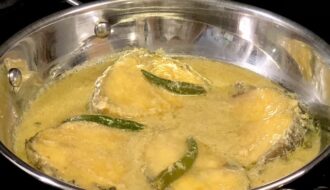
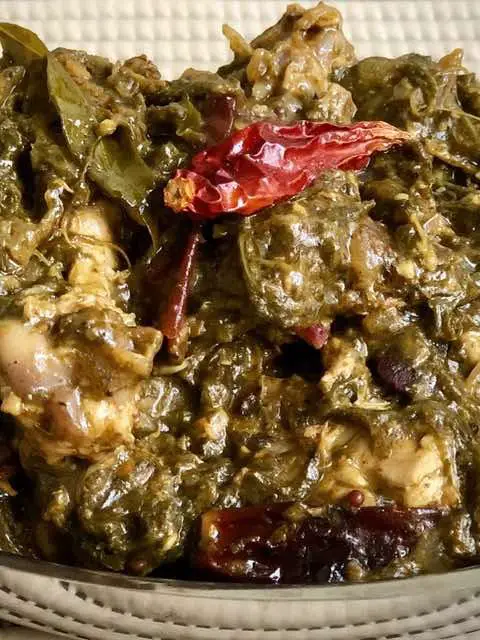
Salan (Gravy served with Biryani)

Notes
- For more detailed tips for making restaurant style mutton Biryani at home and to know my favorite brand of basmati rice, check out the video recipe!
- Some people prefer to add cucumber and sugar to the raita. Mutton biryani has a deep flavor, so a simple raita (like the one I showed here) tastes best.
The Best Hyderabadi mutton Biryani recipe restaurant style, Paradise Hyderabadi mutton Dum Biryani, The best hyderabadi mutton biryani, Hyderabadi mutton Biryani recipe, mutton Biryani recipe, Hyderabadi mutton Dum Biryani recipe, Hyderabadi mutton biryani recipe, Restaurant style hyderabadi mutton biryani, Paradise mutton dum biryani recipe, how to make restaurant style hyderabadi dum biryani, hyderabadi goat biryani, goat biryani recipe, restaurant style goat dum biryani recipe