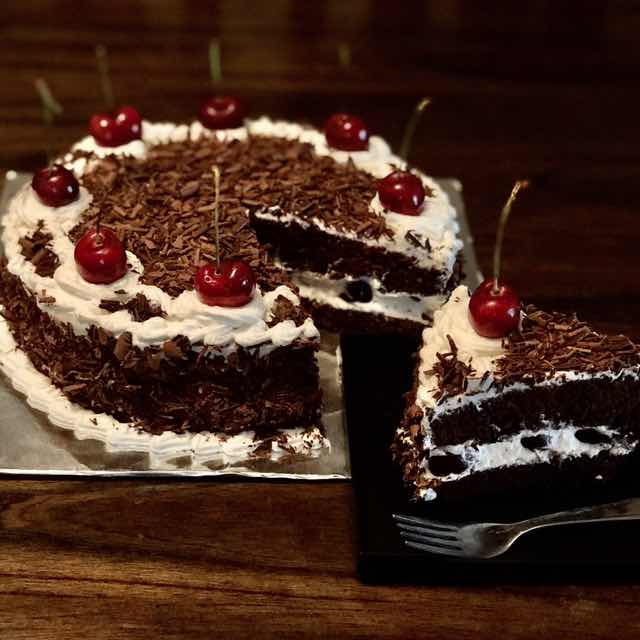
Black Forest Cake! It doesn’t get better than this!
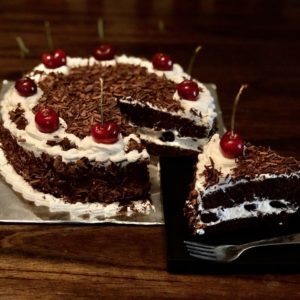
Homemade Black Forest Cake recipe without using an oven
Description
Rich spongy chocolate cake covered in whipped cream, chocolate, and cherries! Once in a while you need to indulge in this heavenly bite!
Ingredients
Instructions
- Add 1 tablespoon lime juice to 1 cup of lukewarm milk
- Mix well and let it stand for five minutes
- Carefully separate the egg yolks from the whites
- Add the egg whites in a clean bowl
- Add 1 teaspoon of fresh lime juice
- Start whipping at medium speed for approximately 30 seconds
- Add some of the sugar and continue whipping for another 30 seconds
- Next add up to half of the total sugar (the lime juice and sugar helps to stabilize the meringue)
- Continue whipping for approximately three minutes, till firm peaks form
- Keep this aside
- Add the egg yolks in another bowl and whisk it till it’s nice and creamy
- Add the butter in
- Mix
- Add the remaining sugar
- Add vanilla extract
- Mix thoroughly
- Add water
- Add baking soda into the buttermilk and mix well (Adding baking soda into the buttermilk prevents the cake from having a soapy taste). The buttermilk immediately turns frothy. If it doesn’t turn frothy the baking soda you’re using is probably not fresh.
- Add the buttermilk in
- Mix everything thoroughly
- In another empty bowl sift the all purpose flour, baking powder, salt and cocoa powder
- Mix everything evenly
- Add the dry ingredients to the wet ingredients little by little
- Keep mixing and make sure no lumps form
- Now fold the mixture little by little into the meringue. (Make sure to fold the mixture gently. If you over mix the sponge cake will not turn out light and airy)
- Line the baking pan with parchment paper. I have used a 9 inch pan
- Pour the cake batter
- Swirl a chopstick in the batter in a circular motion to get rid of all the air bubbles
- You can bake this cake in the oven at 350°F till a toothpick inserted in the center of the cake comes out clean (this will take approximately 45 minutes).
- Don’t worry if you don’t have an oven we can bake it in a pan as well
- Take a wide pan and cover the bottom with salt (1 cm thick)
- Make sure to store the salt after you’re done you can reuse the salt every time you bake
- Place a perforated metal plate on the salt
- Cover and preheat the pan on low heat for approximately five minutes
- Once the pan feels warm put the cake in and place the lid on
- Bake on low heat for 45 minutes or till a toothpick inserted in the center of the cake comes out clean
- We need 2 cups of fresh cherries
- If you don’t have fresh cherries you can use maraschino cherries
- Cut each cherry in half and separate the halves with and without the pit into two separate cups. The halves with the pits will be used to make cherry syrup and the other halves will be put in the cake
- Add the cherry halves with the pits to a pan
- Add half a cup of cane sugar and add half a cup of water to the pan
- Give it a stir and set the pan on medium heat
- Let the cherries cook for 6 to 8 minutes. You will find that the cherries start to swell
- Use a masher to loosen the pulp further
- Strain the cherry syrup. Use a masher to squeeze out all the juice over a strainer. If you’re using maraschino cherries you can make a simple sugar syrup instead
- I used a regular semi sweet chocolate bar and a regular vegetable peeler to peel off shavings
- Transfer the shavings to bowl using a bench scraper and always keep it refrigerated
- Make sure to chill the bowl (in which you are going to whip the cream) and the beaters in the fridge for at least 30 minutes before you start
- Add 3 cups of heavy whipping cream to the bowl
- Add 1/2 teaspoon of vanilla extract
- Start whisking on medium speed for 1 minute
- Add 1/4 cup of fine granulated cane sugar and continue whisking for 3 minutes
- Light and fluffy whipped cream is ready!
- Fill a piping bag with the whipped cream and keep it refrigerated
- De-mold the cake after it cools down and remove the parchment paper
- Level the top of the cake to make sure it’s flat
- Divide the cake into two equal layers. I used a leveler to cut it but you can use a knife as well
- A turntable is very useful if you want to ice your cake uniformly and quickly
- Add a small piece of tape on the turntable and attach the cake board to it (to make sure the cake doesn’t move while rotating the turn table)
- Add a strip of parchment paper on all sides of the cake board
- Put the bottom cake layer in the center
- Drench the cake layer thoroughly with the cherry syrup
- Pipe a thick layer of whipped cream on it
- Flatten it with a cake spatula or a knife
- Place the cherries on the whipped cream
- Pipe another thin layer of whipped cream on the cherries and flatten it with a spatula
- Place the second layer of the cake, drench it with the cherry syrup and add whipped cream
- Apply whipped cream to the side walls of the cake
- Refer to the video to see how to decorate the cake with chocolate shavings and cherries!
Recipe for a quick buttermilk
Recipe for meringue
Cake Batter
Baking the cake
Prepping the cherries
Making cherry syrup
Making chocolate shavings
Making fresh whipped cream
Icing the cake
black forest cake recipe, how to make black forest cake, homemade black forest cake recipe without oven, easy black forest cake, Indian cake recipes, Valentine’s Day cake recipes, black forest cake recipe without oven, cake recipe without oven, chocolate cherry cake recipe, black forest cake with cherries, best black forest cake recipe, how to make black forest cake from scratch, how to make black forest cake at home, birthday cake recipe without oven, Schwarzwalder kirche torte

